A unicorn cake is nearly every young girl’s birthday wish!
You don’t have to order an expensive cake from a bakery to make their unicorn dreams come true!
This easy DIY unicorn cake uses shortcuts from the store, a simple design, and creative decorating ideas.
What I really love about this unicorn cake is that it bakes in a 9×13 pan!
You don’t have to worry about stacking layers and perfect baking execution.
I do highly recommend you use a piping bag to apply the frost this unicorn cake, but if you don’t have one that’s ok.
There are tips below to improvise! 😉
Let’s get to it!
DIY Unicorn Cake Instructions
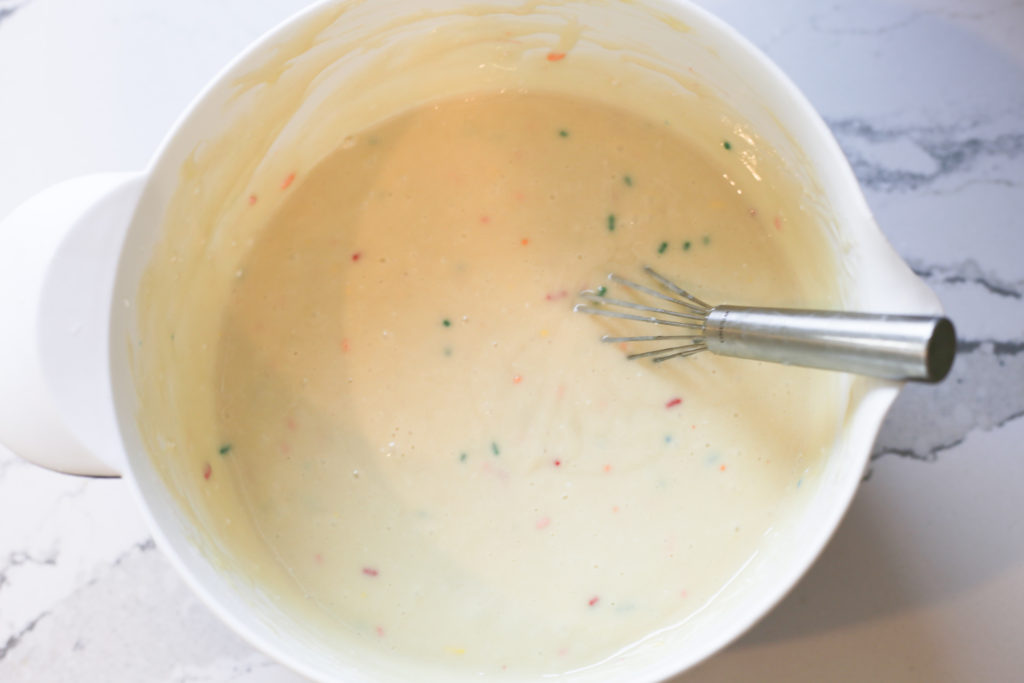
Start by mixing your cake according to package directions.
No fussy baking directions here- simply add oil, water and eggs and mix well!
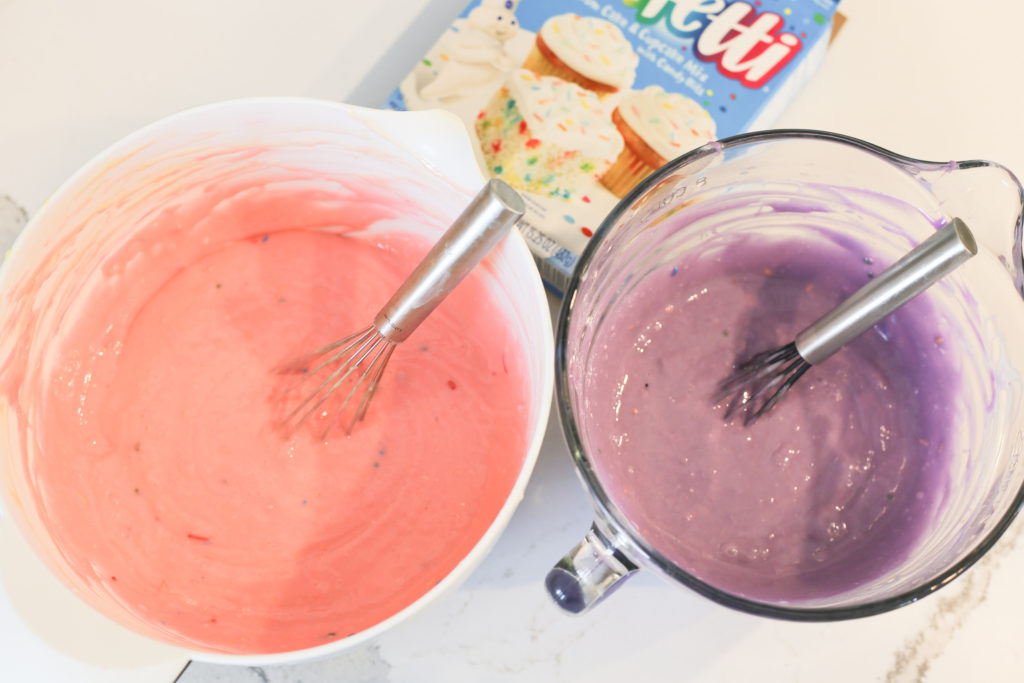
After the batter is prepped, I divided the cake batter into two bowls and colored them with pink and purple food coloring.
I used the neon food coloring package.
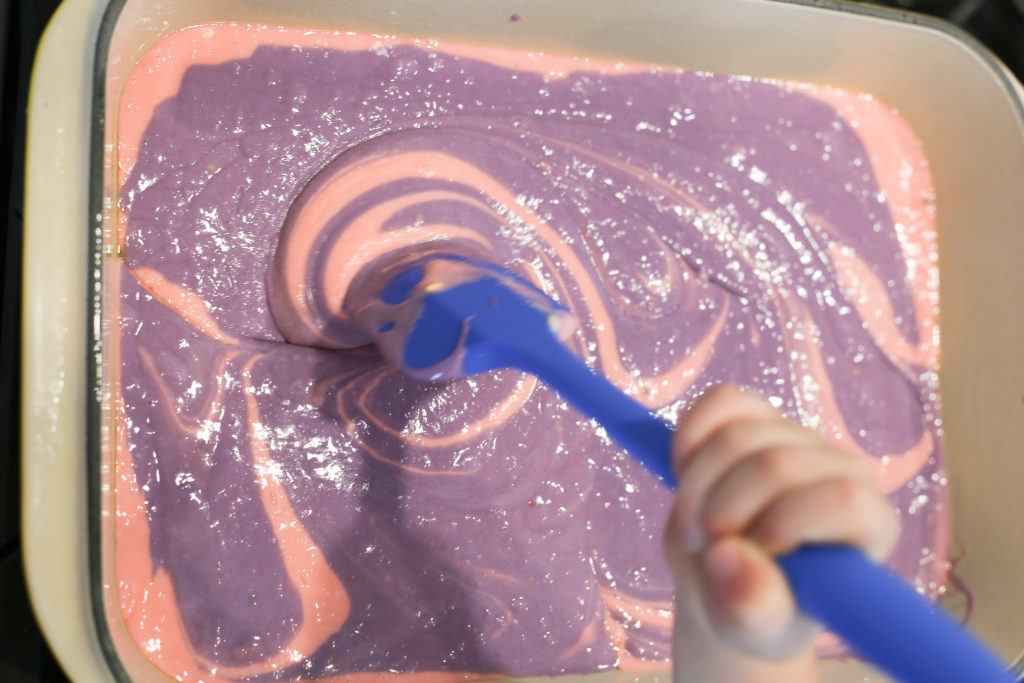
Swirl the cake batters together in a heavily greased 9×13 pan with a spatula or knife.
Bake according to package directions.
Test to see if your cake is done by inserting a toothpick into the center of the cake.
If it comes out clean you’re good to go!
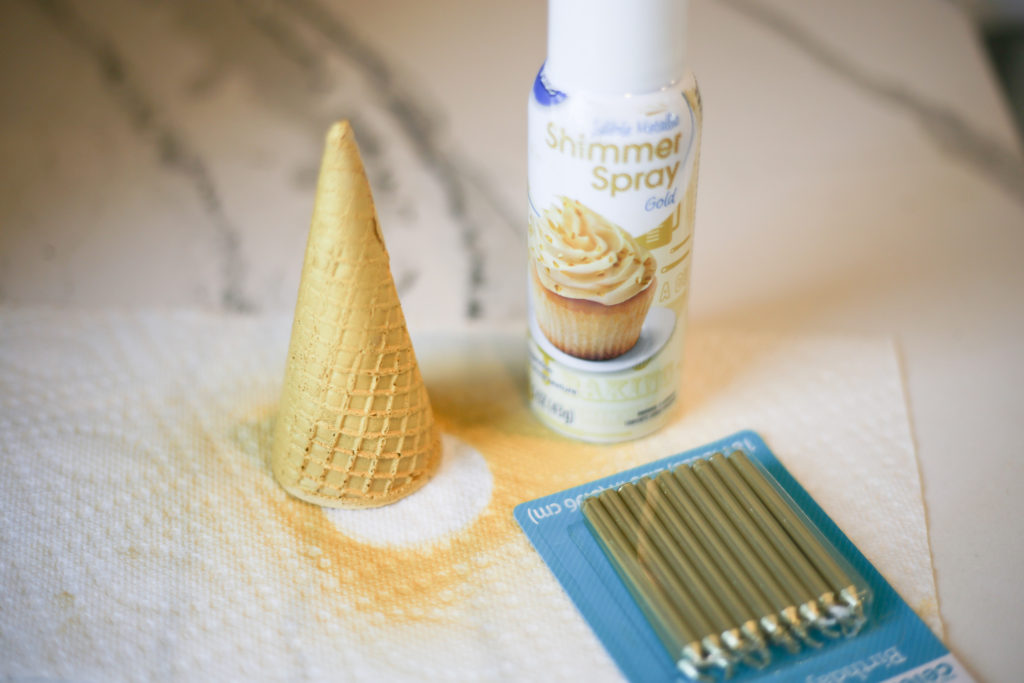
While the cake is cooling, spray your cake cone (unicorn horn) with edible gold shimmer spray.
This step is completely optional, but the gold horn looks pretty great when paired with a package of gold birthday candles! 😉
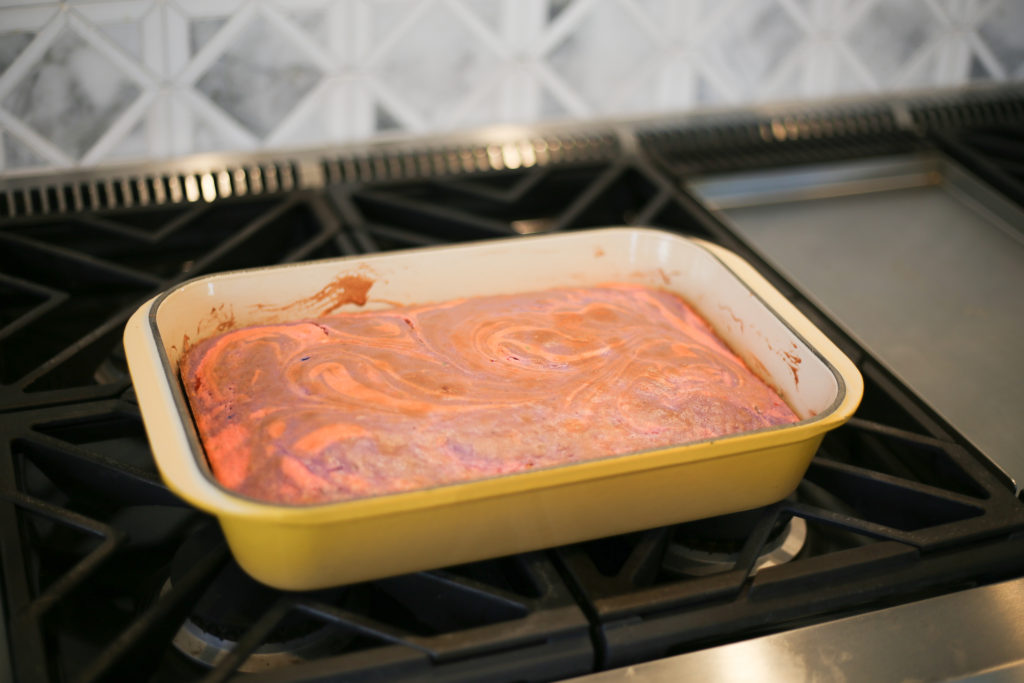
Once the cake comes out of the oven, let it cool for a while in the pan.
This is when I like to whip up the easy homemade buttercream frosting (recipe below).
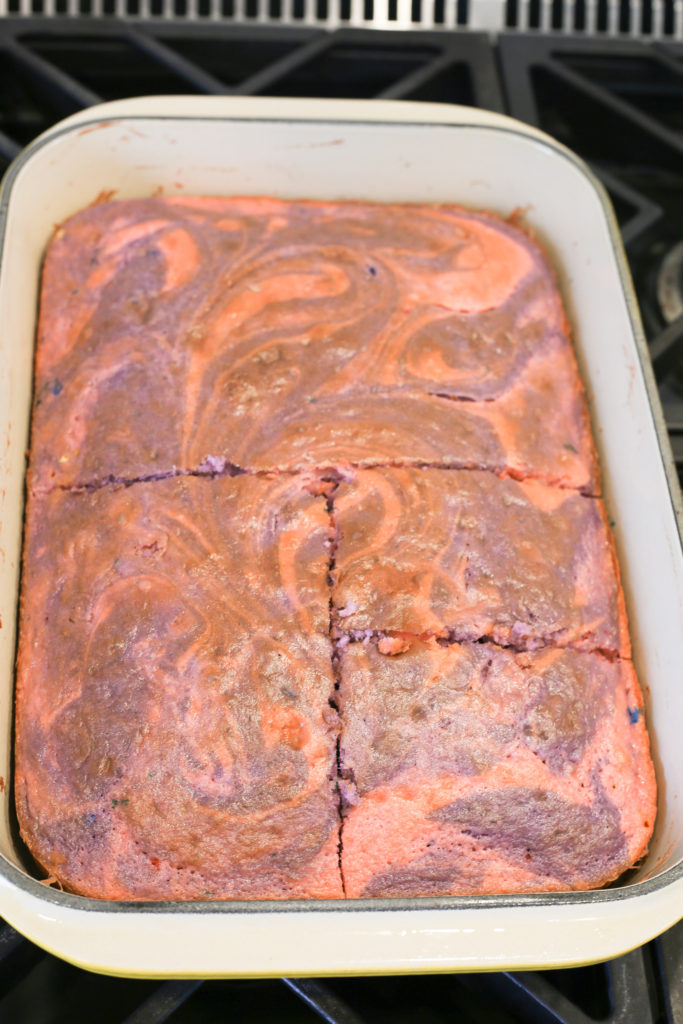
When the cake has cooled some, cut it in the pattern shown above.
The large upper half will be the unicorn’s body.
The lower left quarter will be the head, and the two smaller rectangles will be the unicorn legs.
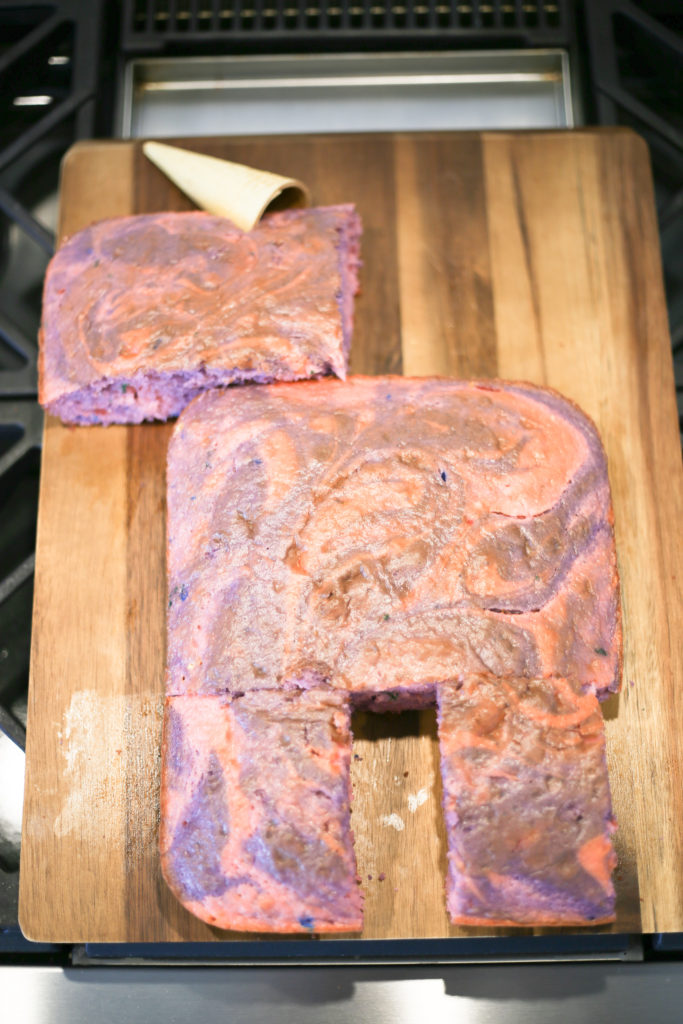
It’s time to bring your unicorn cake to life.
I found a large wooden cutting board to arrange my unicorn cake on for decorating, though a sheet pan or other large flat serving platter would work well.
Carefully notch a small triangle out of the top of unicorn’s head and position your cake cone.
I like to put this in place before I frost the cake so that I can frost around it and seal it into place.
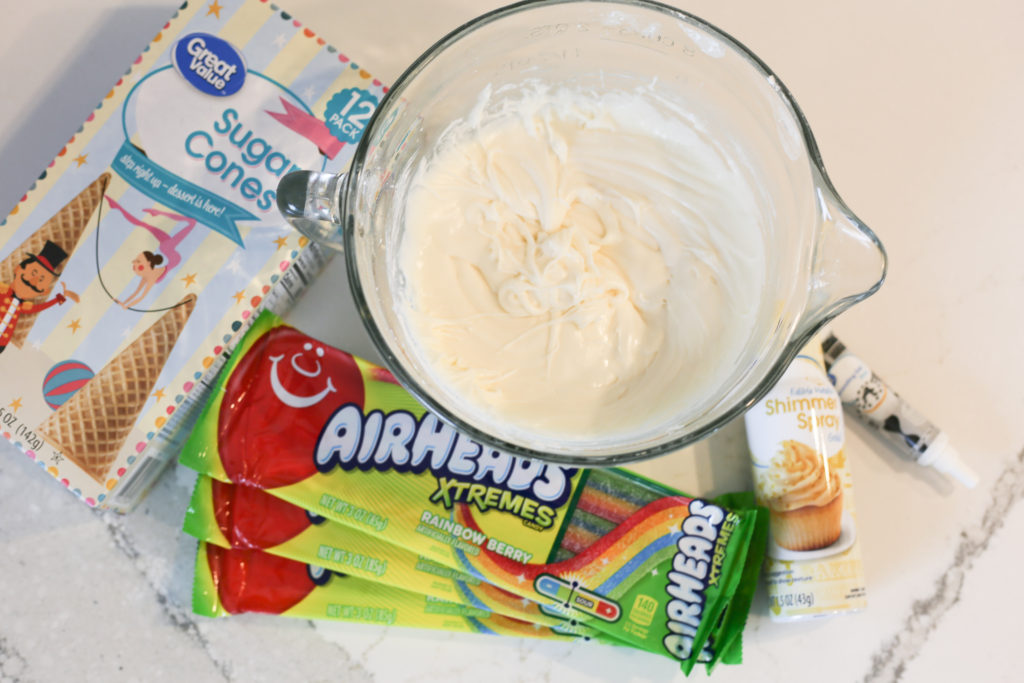
After you’ve mixed up your butter cream frosting and gathered your unicorn cake decorations it’s time to get to work.
If you are piping your frosting with a piping bag, make sure it is slightly stiff. You don’t want it to run down the side of your cake!
If you’re applying it with a knife, it’s ok to leave it a little softer.
Transfer your large batch of white frosting into a piping bag with any desired attachment (I used a star tip).
I started with the sides, then work to the top.
Make small back and forth motions so that you can cover more surface area quickly. 😉
Be sure to leave the unicorn nose and hooves unfrosted!
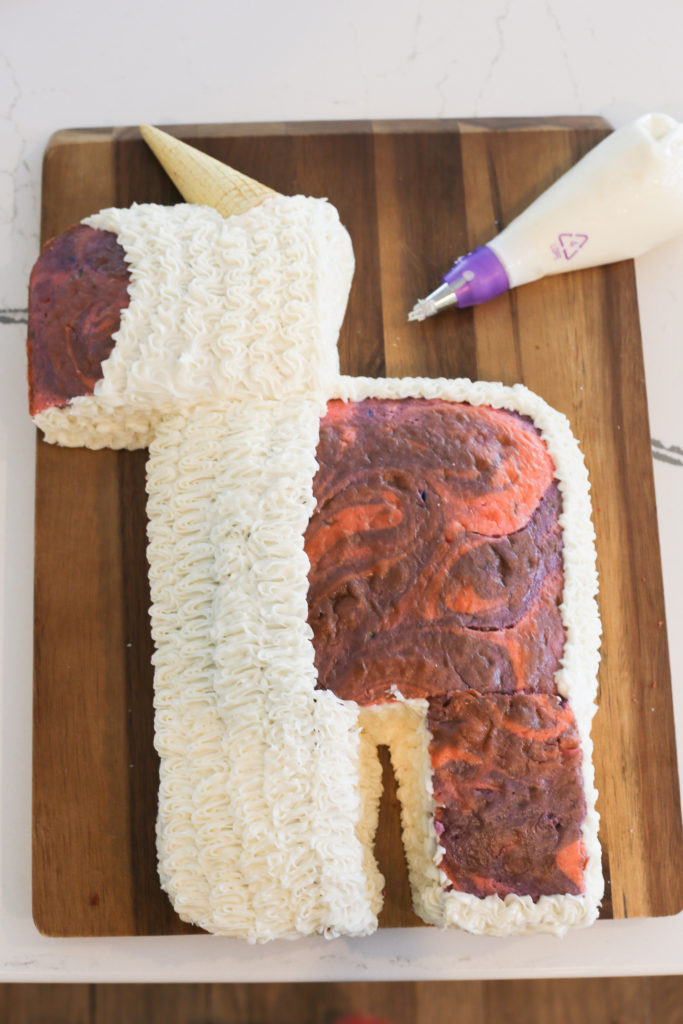
At this point I was a little worried I had created a sheep!!! HAHA 🙂
Don’t worry, the rainbow ropes really bring in the unicorn spirit at the end. 😉
As you pipe your white frosting, you’ll need to replenish your bag.
When you’ve finished your white frosting sections, simply add a little bit of pink food coloring to the bowl of frosting and continue like before.
Finish the unicorn nose and hooves with the pink frosting like before.
Lastly, you’ll use your black cake decorating gel to draw an eye and mouth.
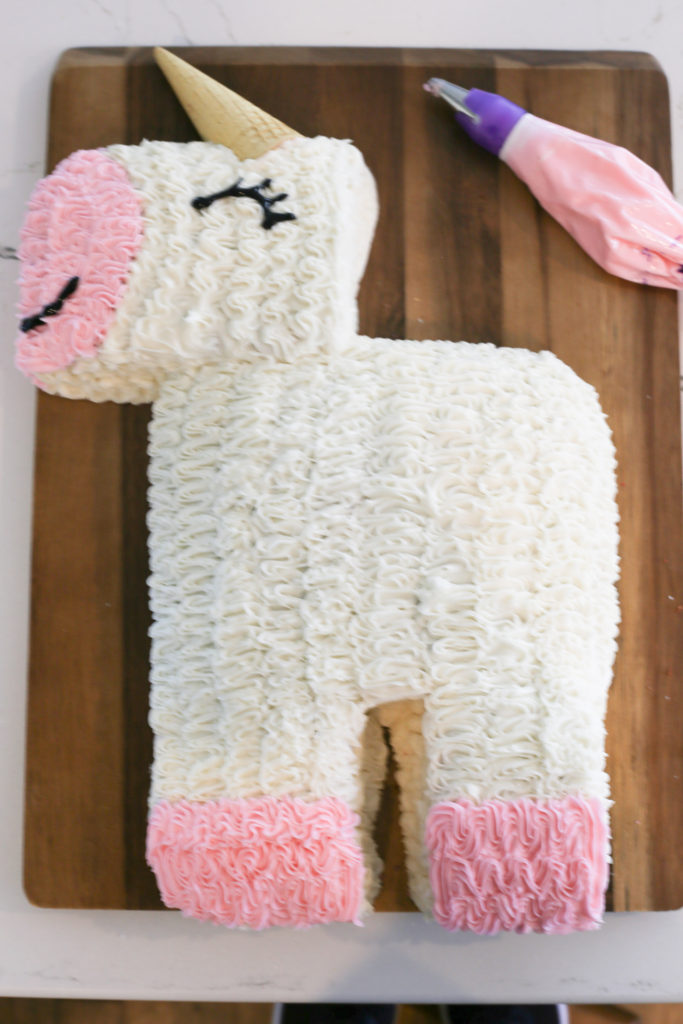
Last but certainly not least, the unicorn cake’s rainbow mane and tale!
This pretty much makes the cake if you ask me.

I simply pressed one end of the airhead extreme rope into the side wall of the frosting.
I then carefully twisted the rope to create a curled effect and layered the ropes on top of each other.
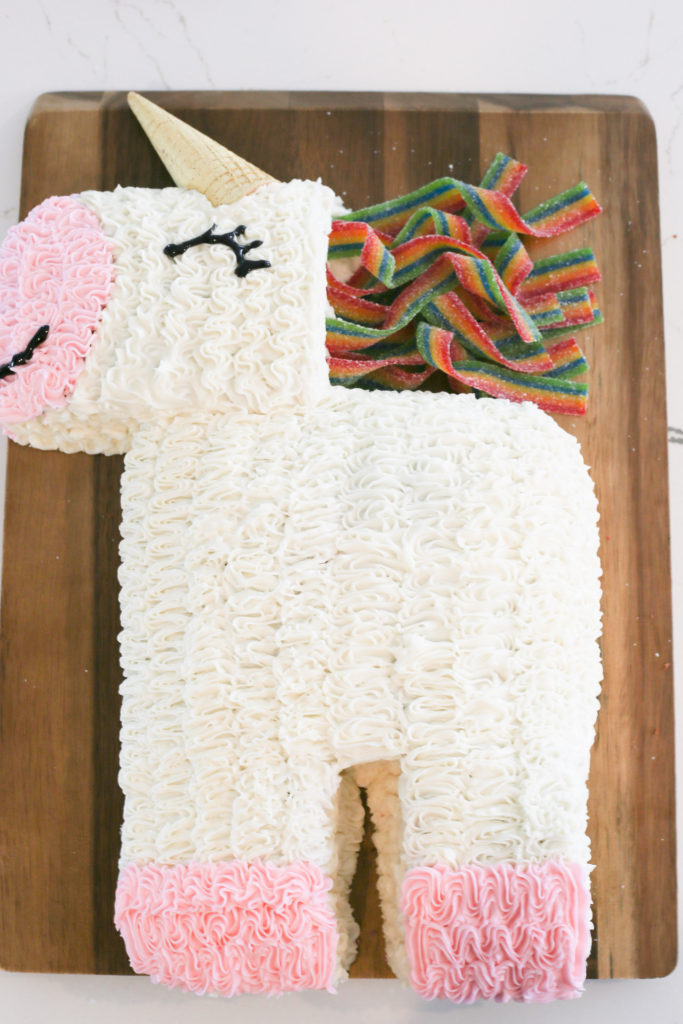
Follow the same process for the tail of your unicorn.
Work from the bottom up, and don’t worry if the rainbow ropes don’t lay perfectly!
You can always rearrange and twist the top sections that you see.
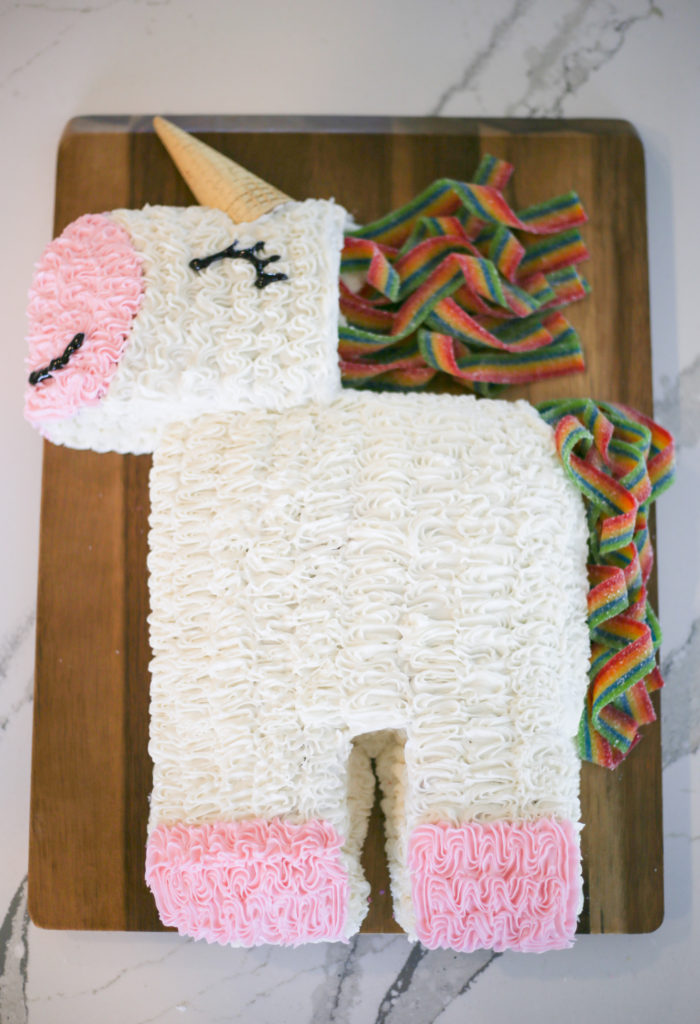
After finishing the unicorn cake decorations, I popped this guy into the fridge until party time.
I made him a day ahead, so that I could plenty of the time on the day of the party to get everything else in order!
I always like to work ahead, which is one of my hostess with the mostess tips to keeping stress free when my guests arrive.
For detailed instructions, check out the full recipe below.
- 1 Box Funfetti Cake Mix
- ½ Cup Vegetable Oil
- 1 Cup Water
- 3 Eggs
- Pink & Purple Food Coloring
- 1 Cup (2 Sticks) Butter Softened
- 8 Cups Powdered Sugar
- 2 tsp Vanilla Extract
- 3-4 Tbs Milk
- 1 Sugar Cone (Unicorn Horn)
- Edible Gold Spray (Optional)
- 1 Tube Black Cake Decorating Gel
- 3 Pkgs Airhead Extremes Rainbow Candy Ropes
-
Mix Cake Ingredients According To Package Directions.
-
Divide cake batter into two pans, and color with pink and purple food coloring.
-
Pour Purple Batter into a heavily greased 9x13 pan.
-
Add Pink Batter on top, and swirl the two colors together using a spatula or knife
-
Bake According To Package Directions, until a Toothpick inserted into the center of the cake comes out clean.
-
While the cake is baking, place your sugar cone on a paper towel and spray gold with edible gold flakes.
-
Once Cake has cooled, cut it in half while in the cake is in the pan. Cut one of those halves again to make two quarter sections. Halve one of those quarter sections (see picture).
-
Using a large spatula carefully transfer cake sections to a large flat surface for decorating (see picture).
-
Cut a small triangular notch out of the top of the cake to place the sugar cone as the unicorns horn
-
Mix softened butter, powdered sugar, milk and vanilla until smooth
-
Transfer ½ of the frosting into a large piping bag fitted with any desired cake decorating tip
-
Start by piping the sides of the cake with up and down strokes, being careful to avoid the feet and nose area (those will be colored pink).
-
Continue to the top of the cake leaving the bottom of the feet, and nose bare. Continue to add white frosting to your piping bag as needed.
-
Once the body of the unicorn is finished, mix a couple drops of pink food coloring into the remaining frosting and transfer into a piping bag.
-
Continue like before, piping the unicorn's feet and nose with pink frosting.
-
Draw your unicorn's mouth and eye with black cake decorating gel.
-
Create the unicorn's 'mane and tail' by twisting Airhead Extreme rainbow ropes and laying into place. Push one end of the rope into the cake frosting to help hold it in place.
Happy Unicorn Cake Baking My Friends!
I hope you found this tutorial magically helpful! 😉
Let me know if you run into any problems or snags in the comments below.
And remember, it doesn’t have to be perfect!
Cheers for now!
<3 Ang
Before you head out you might be interested in this!
- 10 Quick Cleaning Checklist For Before Guests Arrive
- 10 Crowd Pleasing Food Bar Ideas For A Party
- 7 Go-To Backyard Entertaining Ideas For The Best Party Ever
